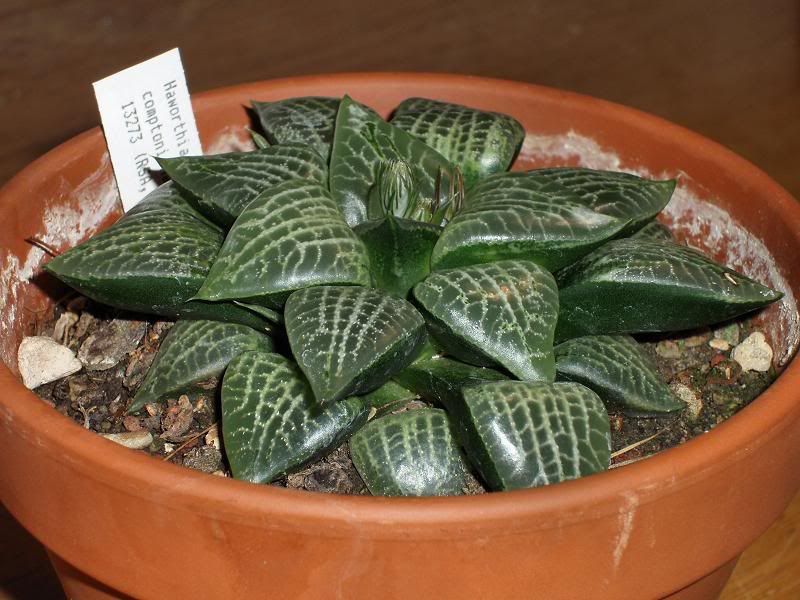
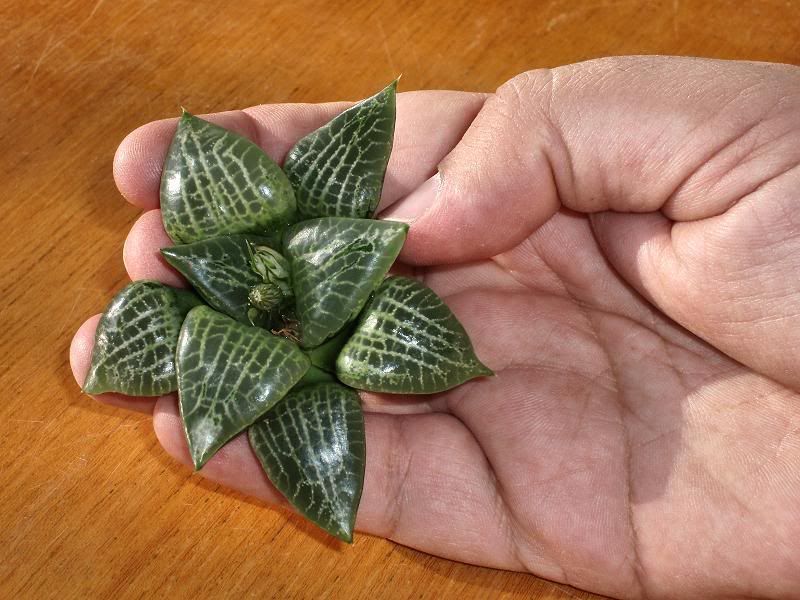
Haworthia emelyae var. comptoniana. Photo: Marlon Machado.
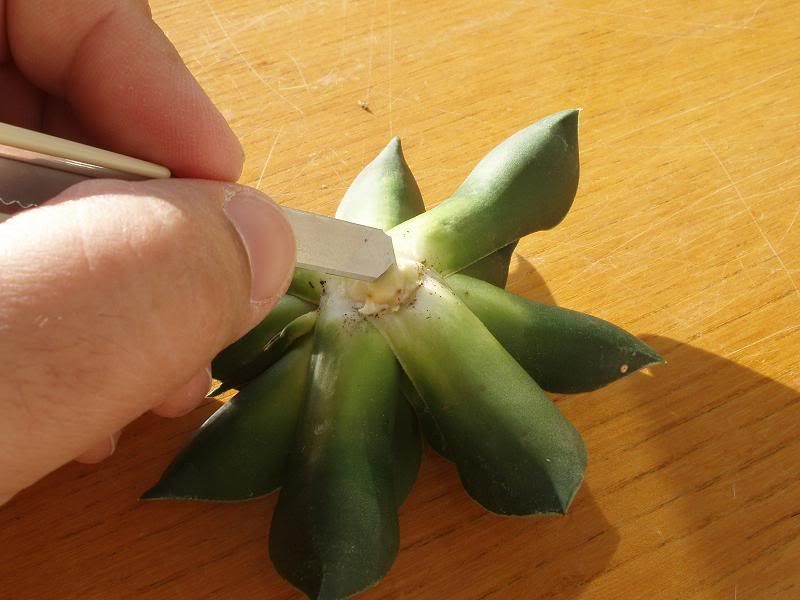
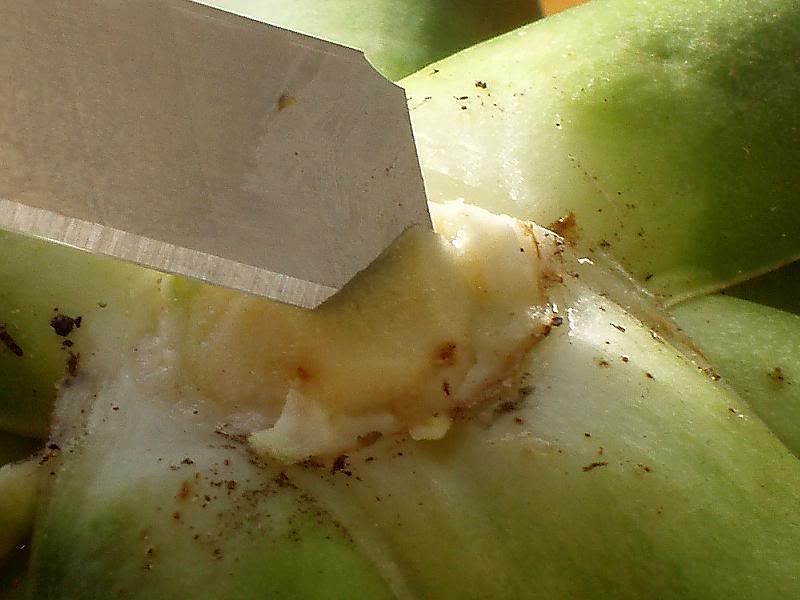
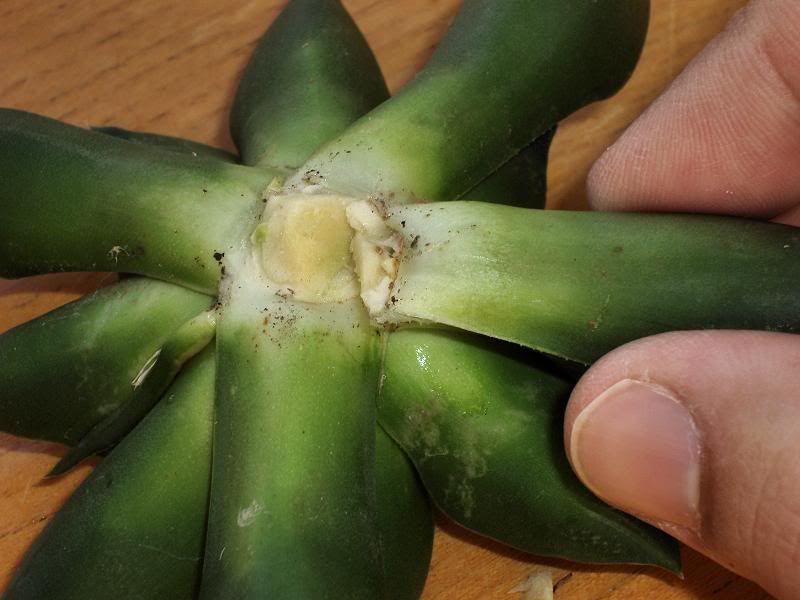
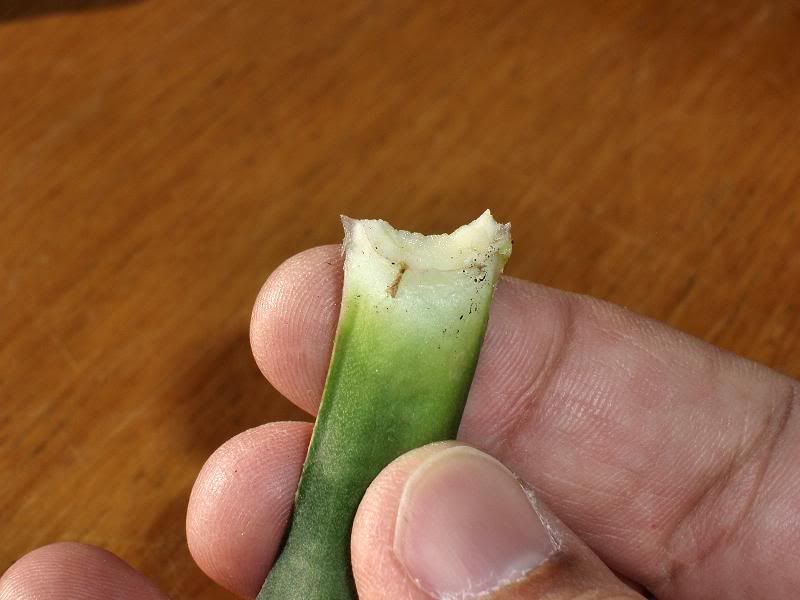
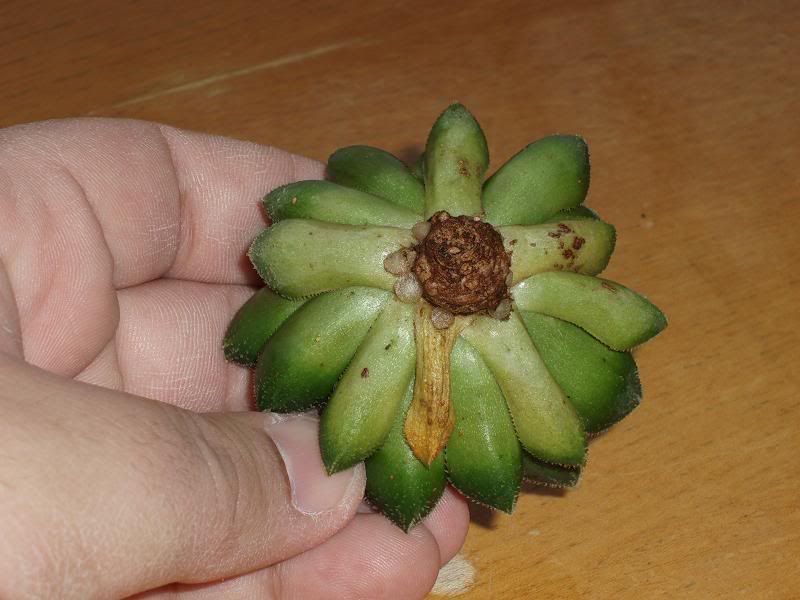
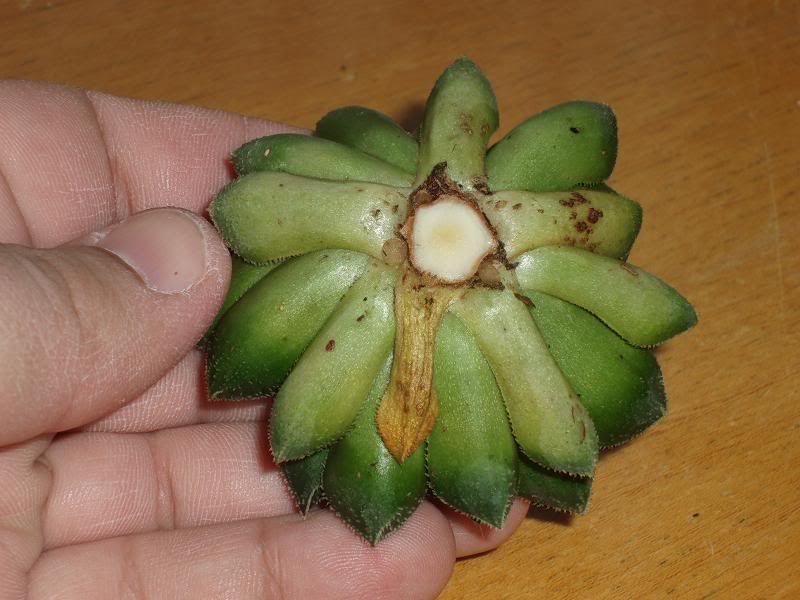
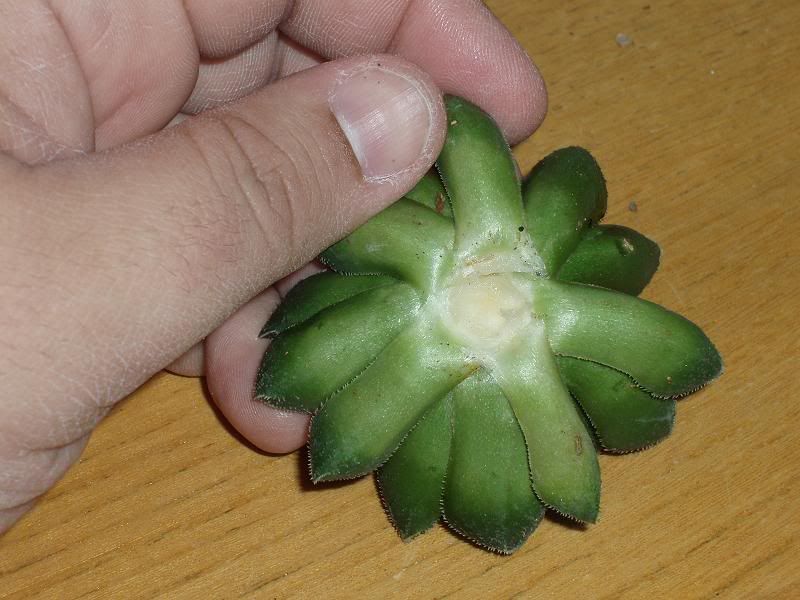
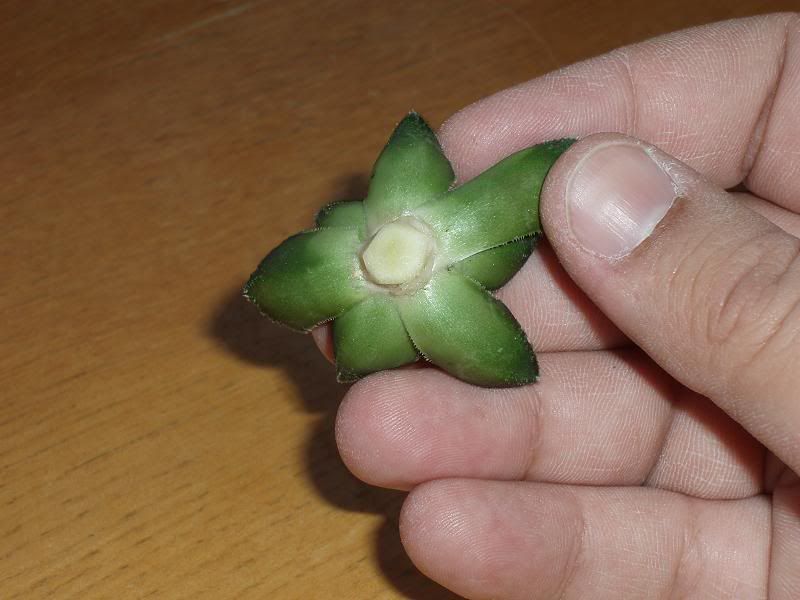
Species of Haworthia can be propagated from leaf cuttings, but the leaves must be whole - the meristematic cells that can produce new plantlets are located at the base of the leaf where it is attached to the stem of the plant. Thus, the leaves must be taken with some stem tissue in order to ensure that the base of the leaves contains the meristematic cells necessary for regeneration of a new plant. In order to do that, you basically has to chop up your plant. It takes some courage to chop up a nice specimen like the one in the picture above, but with time and experience you will find that the procedure I explain below gives very good results.
However, if you are willing to try it, avoid making your first trials with your prized specimen plants, but rather try the technique first with a plant of less value, perhaps with a rosette of that clump of Haworthia cymbiformis that you have somewhere under the stage of the greenhouse. Once you have gained experience and confidence in the technique, then you can move on to apply it to your more prized specimen plants.
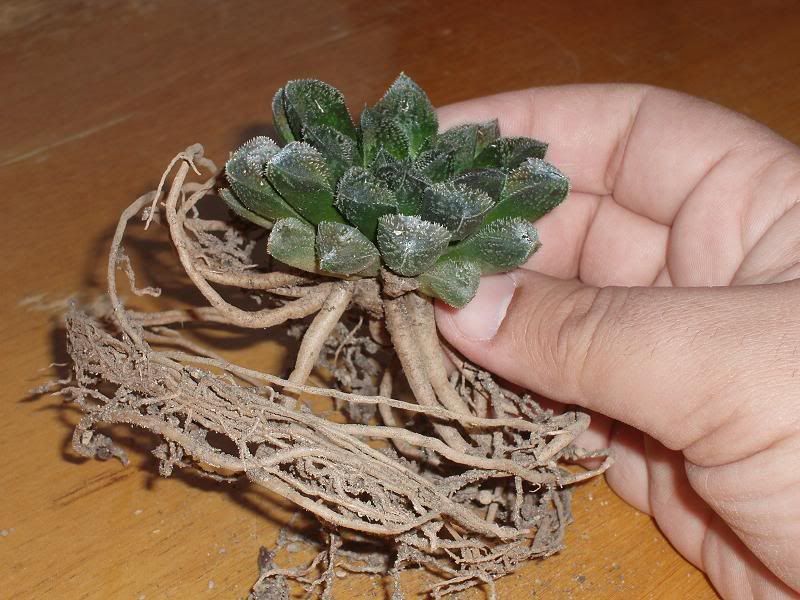
The first you need to do is to unpot the plant. Below is a picture of the specimen of Haworthia emelyae var. comptoniana unpoted, showing a strong root system, even growing new young roots:
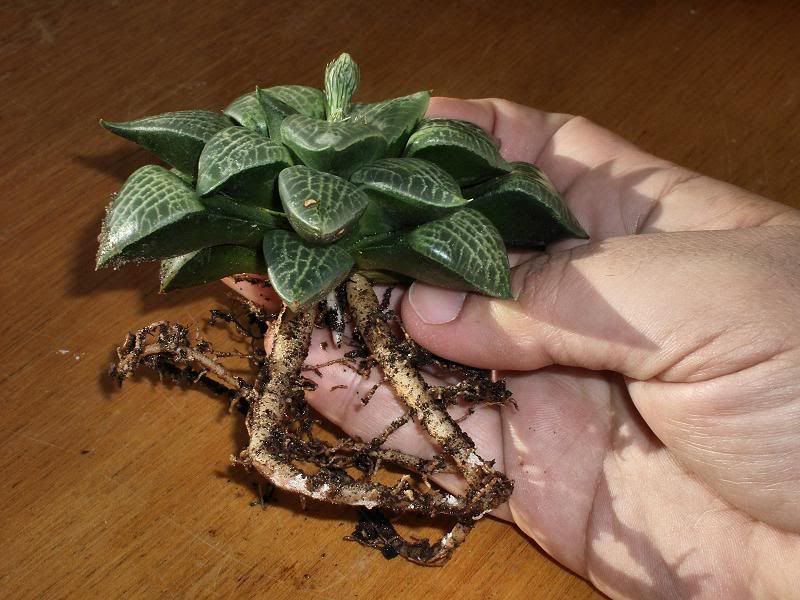
Haworthia emelyae var. comptoniana. Photo: Marlon Machado.
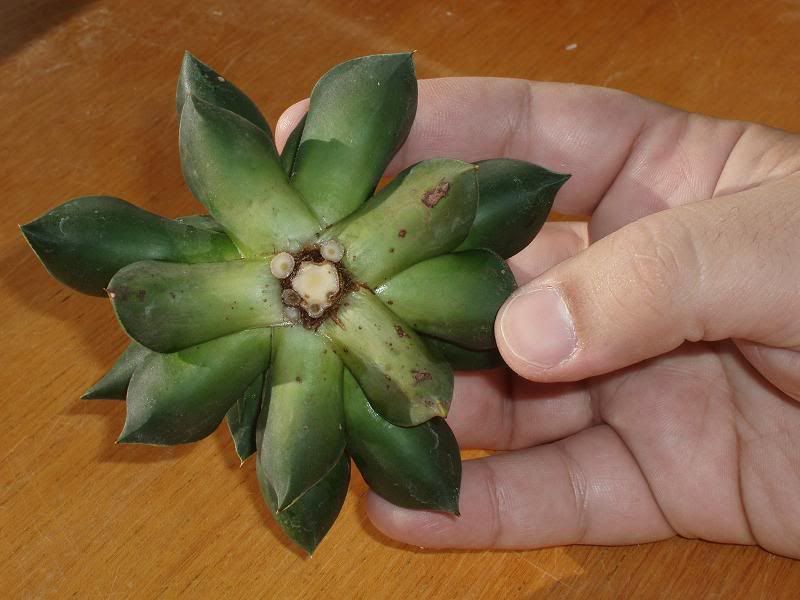
Haworthia emelyae var. comptoniana. Photo: Marlon Machado.
Haworthia emelyae var. comptoniana. Photo: Marlon Machado.
Haworthia emelyae var. comptoniana. Photo: Marlon Machado.
Haworthia emelyae var. comptoniana. Photo: Marlon Machado.
Haworthia emelyae var. comptoniana. Photo: Marlon Machado.
Haworthia emelyae var. comptoniana. Photo: Marlon Machado.
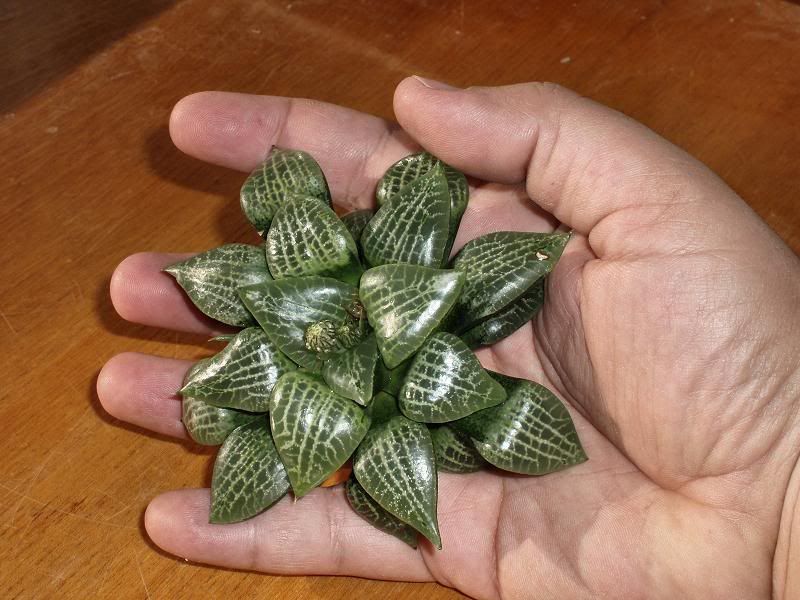
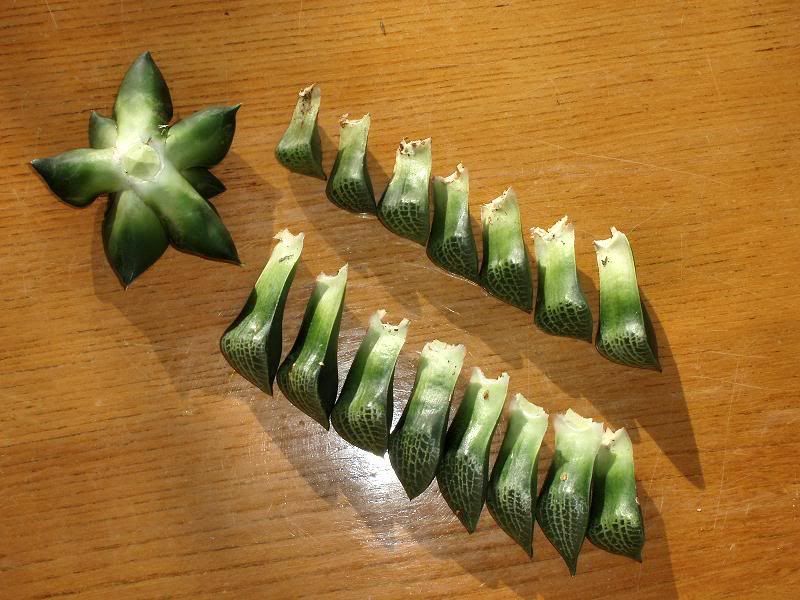
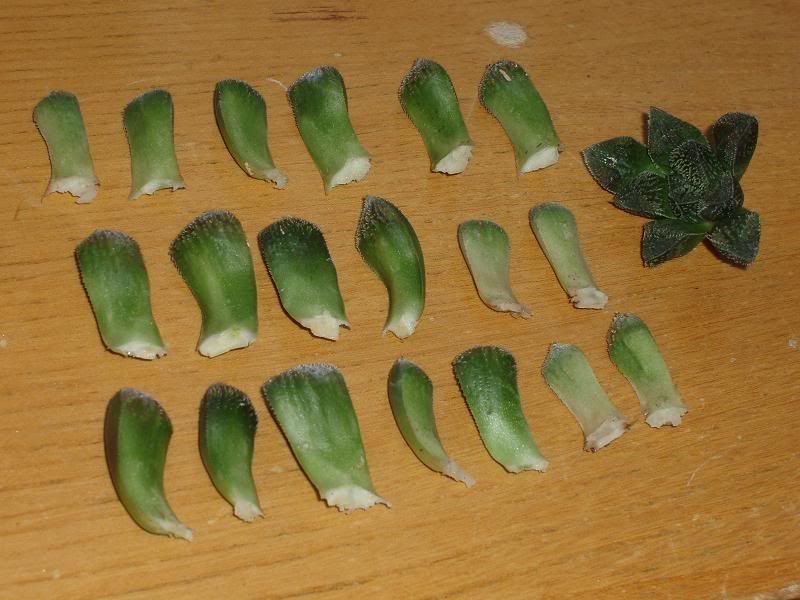
Follows a picture of the leaves I removed from the specimen of Haworthia emelyae var. comptoniana. Fifteen leaves were removed in total, the majority of which will root and get established, and in time each leaf will produce one or more plantlets.
Haworthia emelyae var. comptoniana. Photo: Marlon Machado.
Haworthia emelyae var. comptoniana. Photo: Marlon Machado.
I applied the same procedure to another plant of mine, a hybrid of Japanese origin named 'Kegani'. The plant in the picture below is a specimen that I have grown for over six years. I received it in 2001 as a small cutting with four or five leaves from Alan Pocock. It has grow slowly but steadily, and now in December of 2007 the plant has about 27 leaves:
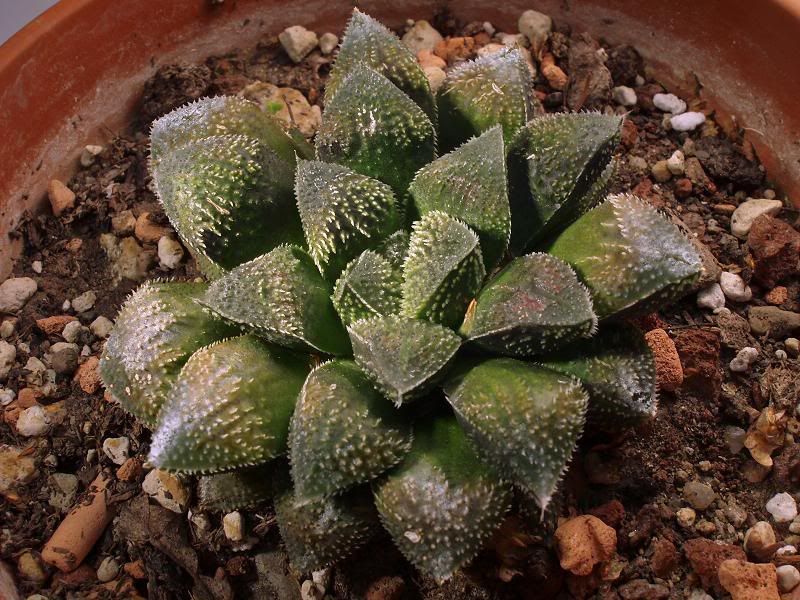
Haworthia 'Kegani'. Photo: Marlon Machado.
Haworthia 'Kegani'. Photo: Marlon Machado.
Haworthia 'Kegani'. Photo: Marlon Machado.
Haworthia 'Kegani'. Photo: Marlon Machado.
Haworthia 'Kegani'. Photo: Marlon Machado.
Haworthia 'Kegani'. Photo: Marlon Machado.
Haworthia 'Kegani'. Photo: Marlon Machado.

Haworthia 'Kegani'. Photo: Marlon Machado.
You should not hurry to pot up the leaves. Place them in a cool and dry, shaded place - but mind you, they should not be left in the dark but in a bright place. After some time - it may take weeks or even months, depending on the species - you will notice root nodules starting to grow at the base of the leaves. It is only then that the leaves can be potted up. By then the rosettes from which the leaves were removed will long have rooted and will already be growing again!
The substrate in which the leaves are potted up should be very open - use coarse sand, or grit, or perlite, or vermiculite, or seramis, or cat litter, whatever you have at hand as long as the medium is open. Also, avoid having a heavy hand at watering - light waterings now and then and frequent spraying is best. The leaves will root and soon they will start to produce little plantlets. Once the plantlets are formed, you can resume a more normal watering regime.
I must really stress that the key to successfully growing new plants from leaves is avoiding potting the leaves up too soon, and avoiding watering them much. The most common reason for failure is too much water at this stage - the leaves will simply rot if watered too much. The leaves do not need much water because initially they will be producing roots and plantlets by using the reserves of water and energy that they contain in themselves. Only after the leaves are firmly rooted and have started to produce plantlets, is that normal watering can resume.
I am sorry I do not have any pictures of plantlets growing out of the leaves to show to you, but trust me, the technique I described above works very well, and it is the only way of propagating vegetatively large numbers of a plant, short of propagation by tissue culture!
As a last note, the technique works best if the plant from which the leaves are to be removed is in good healthy and turgid - nice and plump, with leaves full of water. If the plant is stressed or the leaves are shrivelled, the rate of success will not be as good. Also, not all species of Haworthia can be successfully propagated using this technique. It works best in those species whose leaves have some substance, like the retusoid Haworthia. Species whose leaves are very thin or which have very leathery leaves are less suitable, because either the leaves dry up before rooting or they stubbornly refuse to root.
Cheers,


